An Interactive, User-friendly App is here to make learning Chemistry for young students fun and easy.
For my final project for Nature of Code, I decided to create an easy-to-use and interactive program designed to help children and interested adults with learning chemistry.
This “Easy Chem” app is inspired from my own experience as a chemistry student in high school. Much as I love the subject, I always had a hard time memorizing the color of the end product from the millions of reactions we had to study for our lab exam. While my grandfather (who is a Chemistry professor) would ask me to write down the reaction product with its color 50 times in my notebook in order to remember it, I knew there was a better and easier way to help with the memorization process.
Seeing is believing and so visualizing the color of the end product from a precipitation reaction, by seeing the screen change color instantly and in front of your eyes, will certainly help you remember the name and color of say, the precipitate formed by adding Pb(OH)2 and aq NaOH!
Coding-wise, I tried something completely new (leave aside the fact that everything is basically super new for me as this is my first coding class haha) and decided to go for an interactive hard-coded interface with drop-down menus and chemicals as options to select from and mix together to produce the reaction product.
It was pretty straight-forward to create the 2 Drop-Down menus; as per Professor Shiffman’s advise, I utilized the “createSelect” function built into P5.js. Then it was simply a matter of putting in the option name within each “createSelect” and giving it a 2nd argument (a number, starting from 0). The idea of giving each option for both the drop-down menus a 2nd argument was suggested by Professor and it turned out to be incredibly as I had to add up the items from menu 1 with those from menu 2 in order to simulate the background color change and to make the text (name of the precipitate formed) appear on the screen. Having numbers associated with each option made it easier to write something like the following in my code, when implementing the “if” and “if else” statements within the “draw” function:
if (item1 == 1 && item2 == 1) {
background(255);
fill(0);
text(“+”, 180, 65);
fill(0);
textSize(16);
text(“Pb(OH)2, WHITE CHALKY PRECIPITATE”, 200, 100);
} else if (item1 == 1 && item2 == 2) {
background(255);
text(“+”, 180, 60);
fill(0);
textSize(16);
text(“Pb(OH)2, WHITE CHALKY PRECIPITATE”, 200, 100);
In the above code, item1 and item2 were specified as variables having values sel1.value() and sel2.value() respectively and using numbers like 0, 1, and 2 made it easier to specify the item number and the action to be performed using it.
I can vouch for the fact that the most challenging part was the chemistry itself!
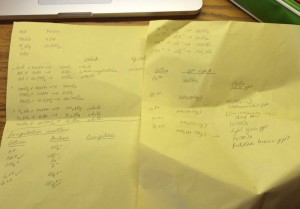
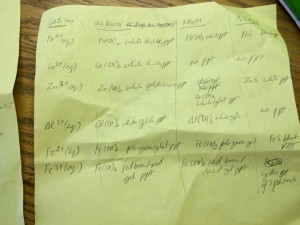
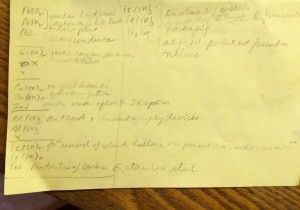 Here are few of my notes!
I had originally planned on using the acid-base neutralization reactions which produce inorganic salts. I wracked up my brain cells to think of the most common acid and base combinations, found out the salts so produced and the uses of the salts. But to my disappointment, it turned out that almost all of the salts were either white/ colorless solids and that did not give any interesting visual results!
So I probed into other common and useful chemical reactions that give colored substances as their end-products and decided to go for PRECIPITATION REACTIONS. This is a great video, the same one I used in my app, describing what precipitation reactions in chemistry are.
Simply put, a precipitation reaction refers to the formation of an insoluble salt when two solutions containing soluble salts are combined. The insoluble salt that falls out of solution is known as the precipitate, hence the reaction’s name. Precipitation reactions can help determine the presence of various ions in solution. I focused on cations only as the chemistry got a lot more complicated by trying to include anions as well.
The gist is that the precipitate can have a nice color (and useful real-life application, which is why it is produced in the first place)!!!
Once the chemistry was good, I was faced with some coding challenges.
- First of all, I wanted to dabble with buttons and link different paragraphs with the buttons. I created 2 buttons- the first one linked to creating a paragraph describing the chemistry behind precipitation reactions; and the second one linked to the use of each precipitate so produced. Professor helped me design the “Chem Info” button in a way that when the user pressed it, it would display the info and on pressing it again, it would hide the info. This was accomplished by the following code:
function Info() {
if (showInfo) {
info.hide();
showInfo = false;
} else {
info.show();
showInfo = true;
}
For the second button, I used the DOMelement.html function to update the text giving out the use of the precipitate for each reaction. However, for every new reaction even though the screen color and the name of the precipitate change automatically, the user needs to hit the “USE” button every time to refresh it. I want the same to update automatically somehow. - The second challenge, even though it may seem minor, was finding a way to customize the font size and style of the DOM elements. I had to use the CSS stylesheet codes to style the DOM elements to my linking. I found this page useful (within the “Using a CSS stylesheet” sub-section).
- The third challenge was inserting my YouTube video into the app. I found this link pretty useful but was still unable to insert the code for a video borrowed from YouTube into the sketch. Again, Professor advised me to use the embed link code from the Share button of the YouTube video and helped me with the code to create a new variable for the video and to customize its position and size. Here is the code for the same:
Finally, with some research and a lot of advise from our Professor, I managed to create something fun and effective!! I would absolutely love to make this app accessible to young students and share it on OpenSource for others to further develop it. Moreover, I would like to share it with Chemistry teachers (including my grandfather) and hopefully, a more advanced version of this app can be used in classrooms in the near future.
PS- Here is the code from my sketch. Code_Tanya
